Leawo PowerPoint to DVD Pro User Guide
Leawo PowerPoint to DVD Pro offers comprehensive, professional but easy-to-operation solution for Office users to watch their PowerPoint slideshow on any media player for multiple uses. Featuring a PowerPoint to video converter, Leawo PowerPoint to DVD Pro could convert PowerPont to video in 180+ formats. Working as PowerPoint to DVD burner, it could convert and burn PowerPoint to DVD for playback on TV and DVD player. Besides PowerPoint to DVD, it is also a PowerPoint to Blu-ray Burner to burn PPT to Blu-ray files for playback on various Blu-ray players or PowerPoint storing. It burns PowerPoint to DVD/Blu-ray with customized beautiful DVD/Blu-ray disc menus for easy navigation with a remote controller.

Convert to
BD/DVD/video
Advanced
Settings
Create Blu-ray
/DVD Menu
Background Music
& Watermark
How to convert PPT to video and burn to Blu-ray/DVD discs
Step 1Import PowerPoint files
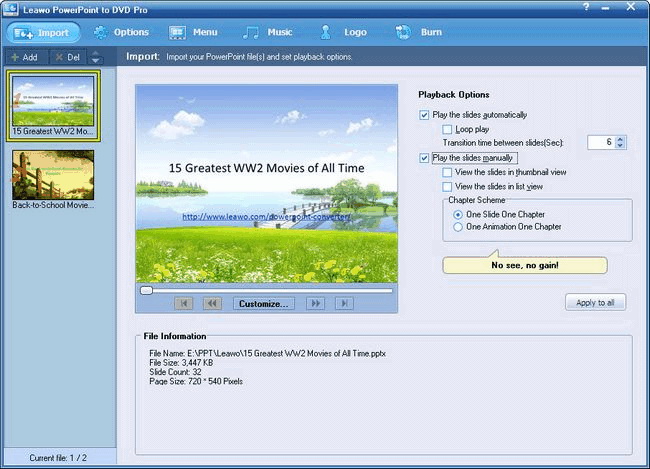
Drag your PowerPoint files into the program, or click "Import” or “Add” button to browse and load source PowerPoint documents. After loading source PowerPoint files, you could see the Playback Options on the right of the program:
- Play the slides automatically: Enable your PPT file on automatic advance mode.
- Transition time between slides: Defaulted to 6 seconds, ranging from 0-100 second(s).
- Play the slides manually: Advance slides with remote control.
- Chapter Scheme: One Slide One Chapter and One Animation One Chapter.
Step 2Choose output mode
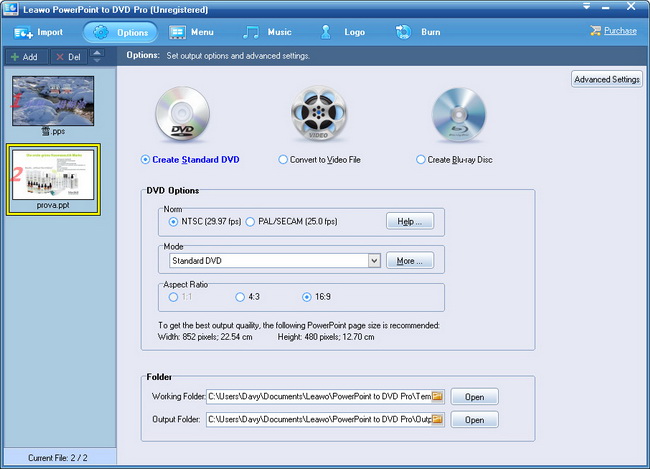
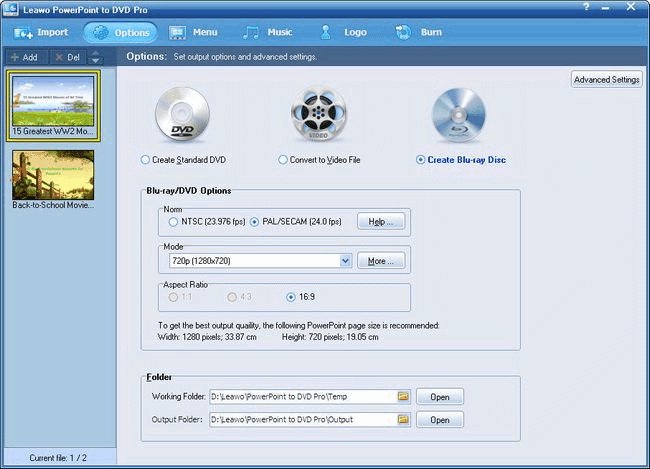
Click “Options” tab to choose an output mode: Create Standard DVD, Convert to Video File or Create Blu-ray Disc. And do related settings for selected option.
Step 3Convert PowerPoint to video/DVD/Blu-ray
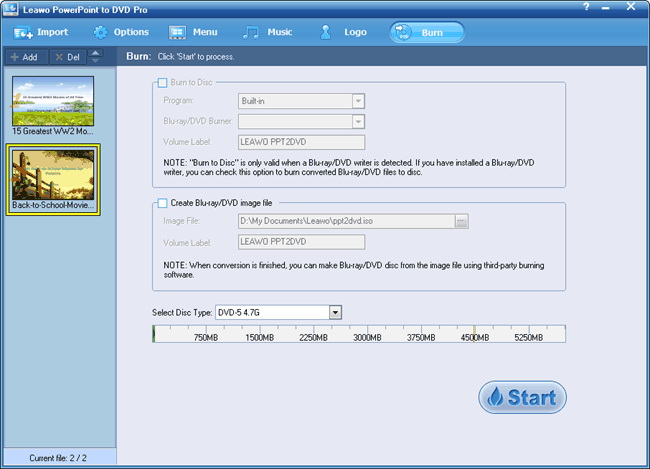
After choosing to "Create Standard DVD Disc", "Convert to Video File", or "Create Blu-ray Disc" options on the "Options" panel, click the "Burn" button. If you choose to "Convert to Video File" option, directly click the "Start" button under the "Burn" tab to start converting PowerPoint to video. If you choose "Create Standard DVD Disc" or "Create Blu-ray Disc", under the "Burn" tab, you need to figure out which output type you need: disc or ISO image file. And then finish related settings. At last, click the "Start" button to start burning PowerPoint to DVD/Blu-ray.
Advanced Settings
Under the "Options" tab, you need to carry out several advanced settings.
For burning PowerPoint to DVD/Blu-ray Disc:
Set Blu-ray DVD options: Norm, Mode and Aspect Ratio. If you're not sure about the "Norm", click “Help” button to choose according to your country. Set a folder for temp files and output files in “Folder”.
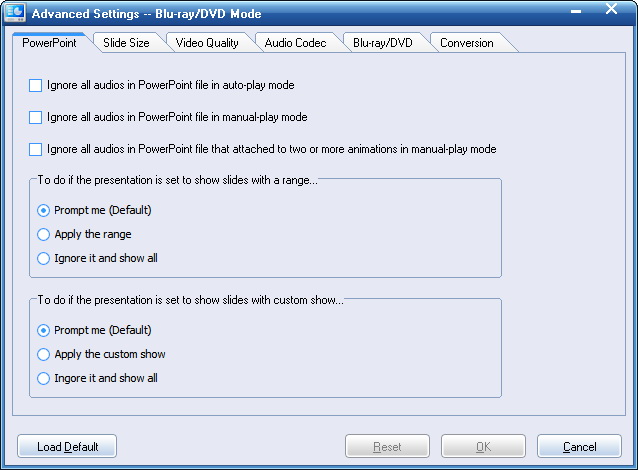
Click “Advanced Settings” to customize the DVD/Blu-ray slideshow. You are able to adjust audio status in your PowerPoint file, size of slides, quality of video, audio codec, DVD/Blu-ray language code, DVD/Blu-ray menu parameters, and conversion status in this step.
For converting PowerPoint to video:
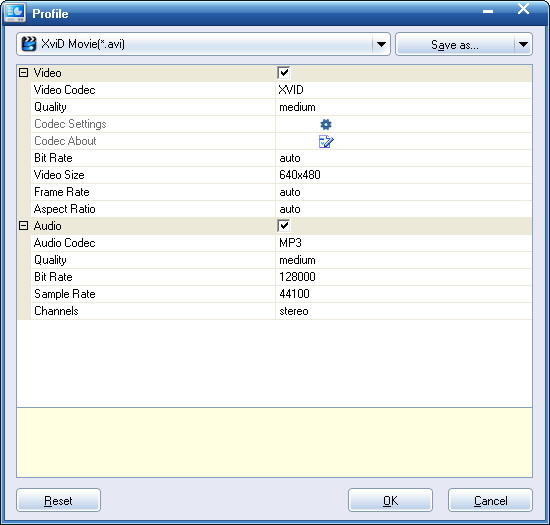
After ticking "Convert to Video File" option, select a format as output profile from the "Profile" box. To do advanced settings, click “Settings” button to adjust audio and video parameters like codec, video size, bit rate, aspect ratio, frame rate, channel, etc. After modification, you can click “Save As” to save your settings as a new profile for future use.
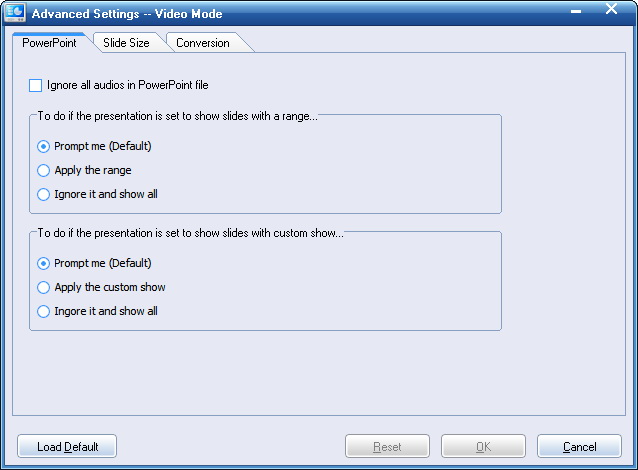
Click “Advanced Settings” to customize the output video include keep original audio, slide size and conversion mode.
How to create DVD/Blu-ray Menu
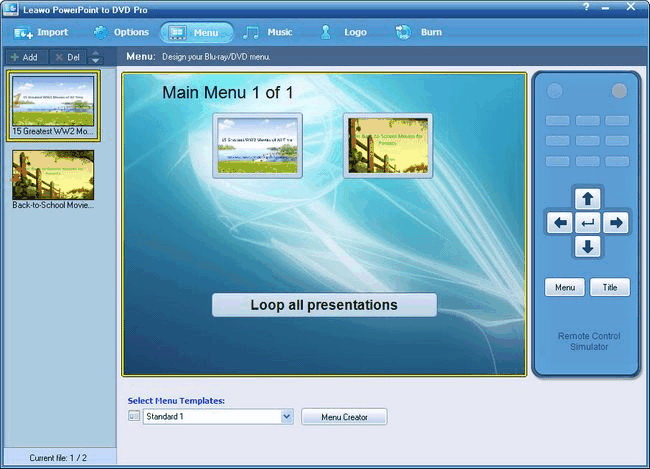
- Leawo PowerPoint to DVD Pro offers you a disc menu designer to edit disc menu for output Blu-ray/DVD content. Firstly select to "Create Standard DVD Disc" or "Create Blu-ray Disc", and then click “Menu” tab to choose a preset DVD/Blu-ray menu template or create your own disc menu.
- Click the “Menu” button in the simulator to select the main menu for preview or editing.
- Click “Title” to preview or edit a title menu.
- Click “DVD Menu Creator” to create your own DVD/Blu-ray menu.
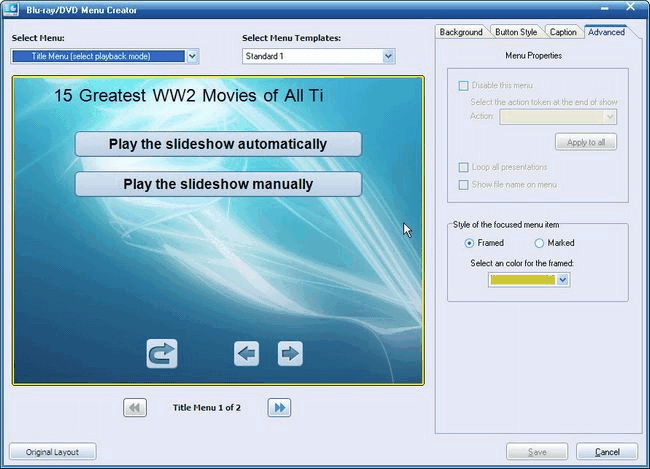
On the "DVD Menu Creator" interface, you can edit the existed DVD menu template and create your own DVD/Blu-ray menu.
- Select Menu: Choose to edit main menu or title menu.
- Select Menu Template: Choose a built-in menu template for further editing.
- Background: Customize menu background with picture, video and background music.
- Button Style: Change the button style and frame style.
- Caption: Adjust the text on the menu, like font, size and color.
- Advanced: Choose to loop all presentations and show file name on menu or not.
How to add background music to PowerPoint presentation
- With a built-in background music adder, you could freely add your favorite songs as background music. Open “Music” tab to add audio file as background music for your DVD/Blu-ray slideshow.
- Auto mode: You can add up to 5 audio file in sequence for one object.
- Manual mode: You can add one audio file to every single slide of a PPT file separately.
- In both modes, you can set the delay timing and choose loop play or not.

How to add watermark to your PPT
You could also add a watermark to output video/DVD/Blu-ray slideshow by making use of the "Logo" function. To give a mark to output DVD or Blu-ray Disc, click on the "Logo" tab.
- Logo:Add pictures, e.g. your company trademark, your avatar or favorite picture as watermark for output DVD/Blu-ray Disc.
- Video Layout: Resize the output video and fill the margin with your own picture.
![]()
![]()
Users Say
As consumers, I love companies offering solid product guarantees. It proves the company has faith in its product, and is making a solid effort to gain your trust.
-From Donald through our support center
Social Network
Join Our Newsletter: