How to Use Leawo Video Converter for Mac
As a professional and comprehensive Mac video/audio converter program designed to well handle format incompatibility issues for Mac users, Leawo Video Converter for Mac could convert video and audio in almost all formats. Achieving the target of various video and audio formats conversion, it could make video and audio playback attainable on different portable devices without barrier. Besides the role of Mac video converter, this Mac media converter draws public attention by allowing people to edit videos and create 3D movies out of 2D sources with a built-in video editor and an internal 2D to 3D converter respectively. Because of powerful and practical functions, Leawo Video Converter for Mac surely guarantees a quite satisfactory movie experience. The following step-by-step Mac video converter guide will show you how to convert video on Mac with Leawo Video Converter for Mac.
Note: If you want to decrypt and convert VOB files on Mac, please use Leawo Blu-ray Ripper for Mac as VOB files are usually encrypted.

Convert Videos

Advanced Settings

Video Editing

2D to 3D Conversion
Converting video on Mac
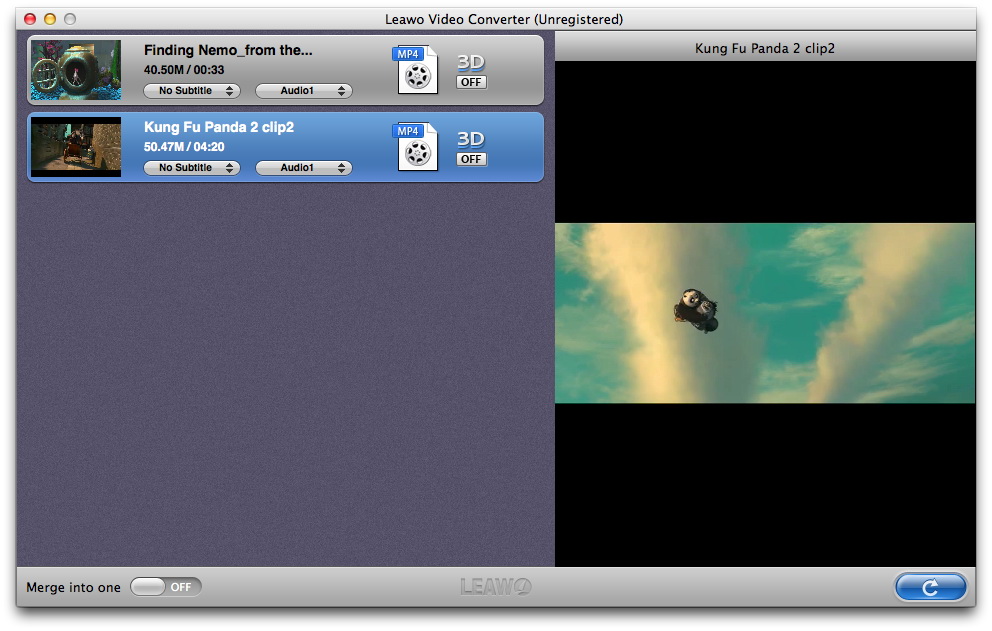
Step 1 Load videos to this Mac Video Converter
With Leawo Video Converter for Mac running on your Mac computer, click the "Add" icon to import source video or audio files or directly drag and drop media files to the program. After loading source files, you can adjust the file order for output files, preview the file content (either double clicking the video file or click on the "Play/Pause" button on the video preview window), capture image snapshot for further use if necessary, select subtitles and audio tracks from source videos for output files, merge selected files into one, etc.
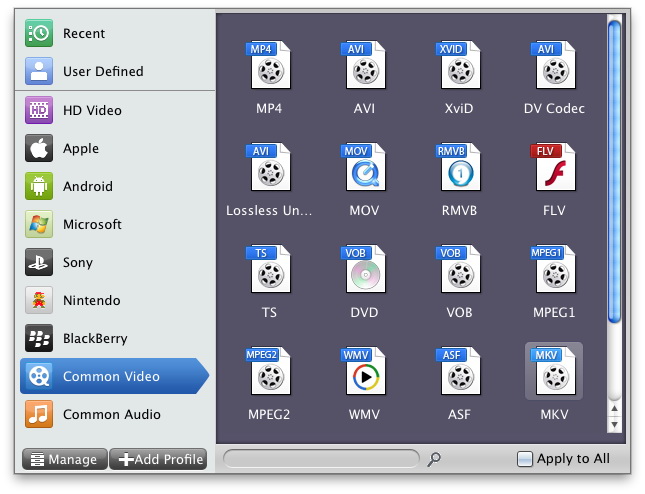
Step 2Output profile setting
Click the format icon button before 3D in each title on the left processing panel to activate the Profile selecting interface, on which you shall select an output format according to your own requirement. On the left side of the interface, you can firstly choose the type of device or video for the-next-step exact format selecting. For time and energy saving, you can also make good use of the "Profile Searching Function" at the bottom to get access to the target format quickly.
Note: For time and energy saving, you can click “Apply to all” button at the bottom right of the Profile panel to make a format you select as the output format for all source videos.
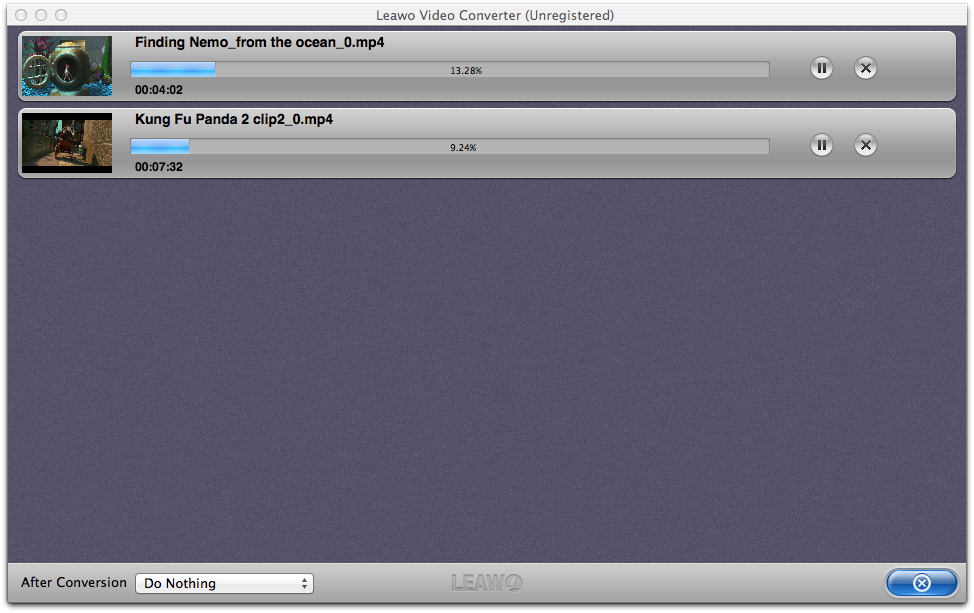
Step 3Start to convert videos
After the output format is selected, you will be returned to the main interface. Click "Convert" button at the bottom right of the main interface to get the conversion process started.
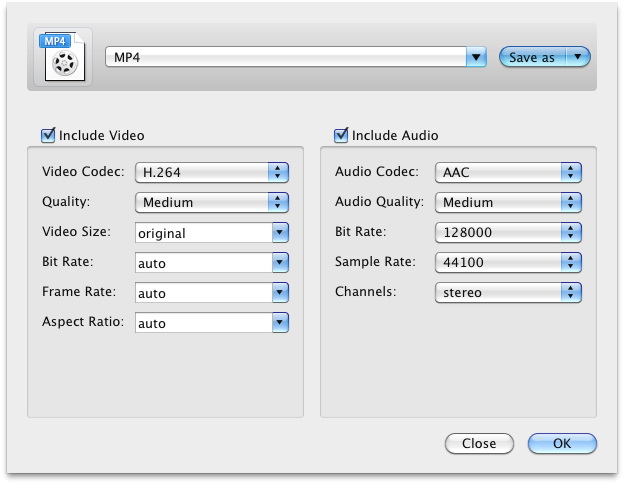
Advanced output file parameter settings
On the “Profile” selecting interface, you can click the “+” button to tailor the output file video and audio parameters in detail, such as video and audio codec, video and audio quality, video size, video and audio bit rate, frame rate, aspect ratio, sample rate, and audio channels. By setting the parameters in detail, the output file may perform an excellent effect. After all detailed setting, press "OK" button to confirm.
How to Edit Video
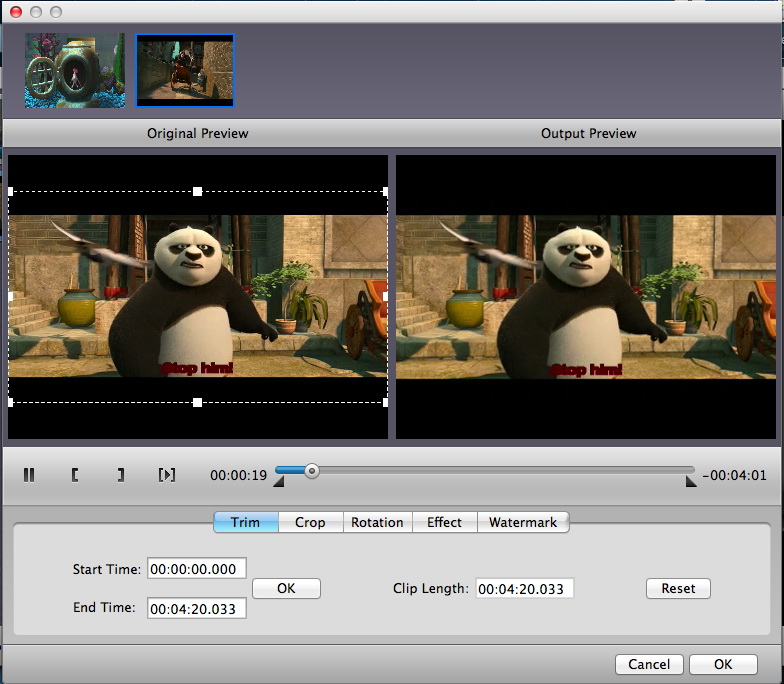
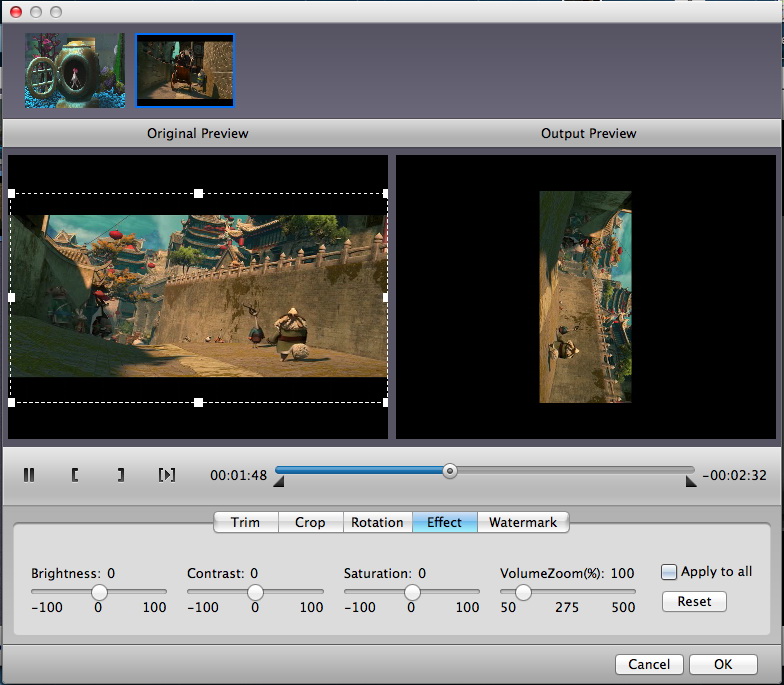
This Mac Video Converter is equipped with a built-in video editor, which allows you to trim video length, crop video size, rotate video to a specific angle, adjust video effect and add watermark. There are five sections on the video editing panel, namely, "Trim", "Crop", "Rotation", "Effect" and "Watermark".
To trim video length, two values about "Start Time" and "End Time" needs confirming. Under "Trim" tab, you can either manually input the values into the relative box or directly drag the slider to get desired video segment converted on Mac.
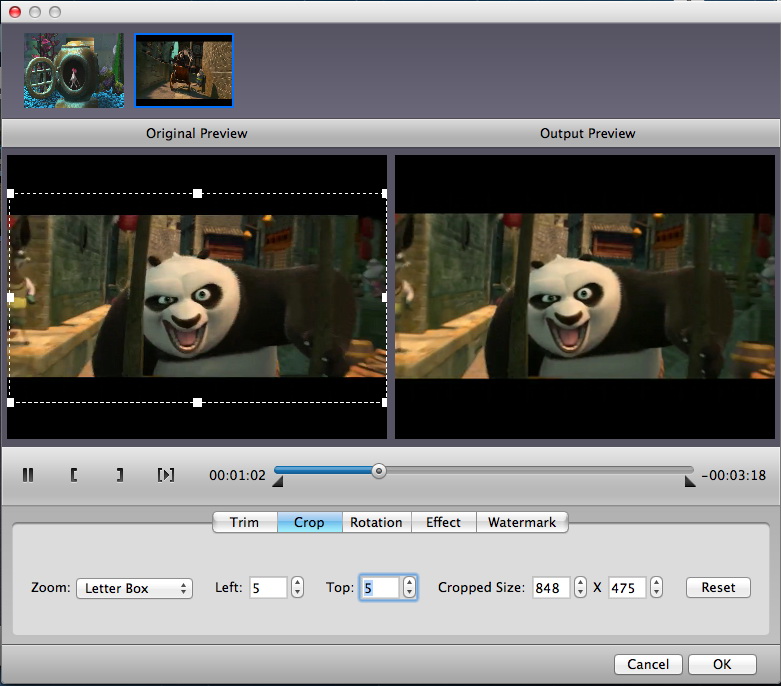
Under “Crop” tab, you can get rid of the black margins of videos. Firstly choose a cropping style from "Zoom" and set the values in "Left", "Top" and "Cropped Size" frames to crop video size and leave out black margins. Or directly drag the dot frame on the "Original Preview" window to crop video size. You can have the output preview on the right window while you are cropping the video.
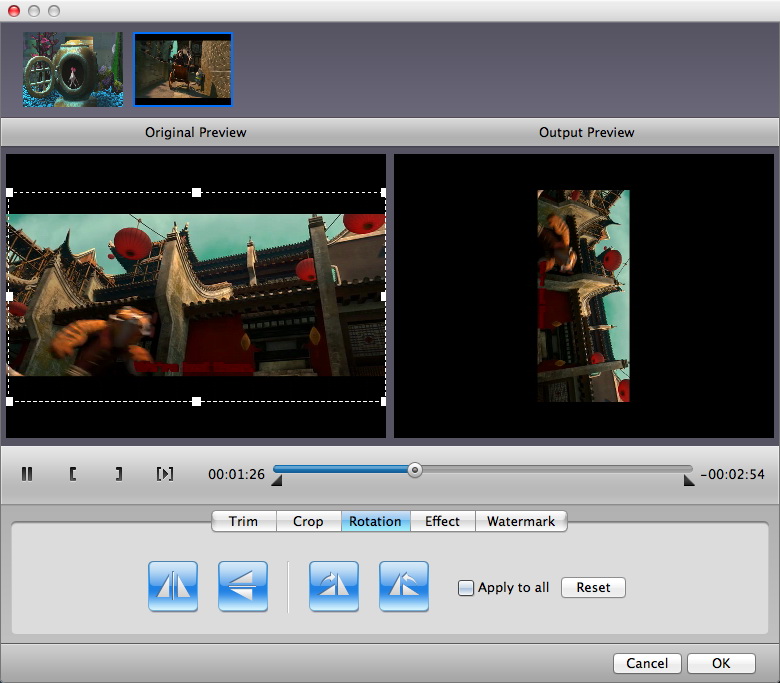
You can rotate the video to a specific angle according to your own preference after entering “Rotation” module, where you can achieve horizontal flip & vertical flip, or realize to rotate 90° clockwise and rotate 90° counterclockwise. If the adjustment is beyond satisfaction you can reset it as well.
Click "Effect" tab for video effect adjusting, and then simply drag the slides of "Brightness", "Contrast", "Saturation" and "VolumeZoom" to adjust the output video effect. Press "OK" to confirm the setting.
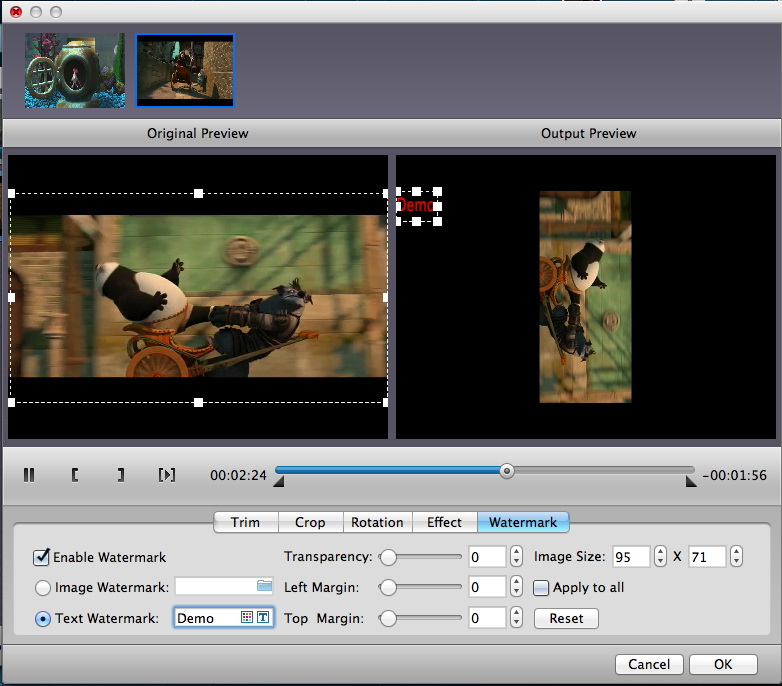
You can also add image or text watermark. Press “Watermark”, check “Enable Watermark”, and then you can add watermark as you like. You can also customize image or text watermark, such as Transparency, Left Margin and Top Margin. When text is added, you are able to adjust text color, font and size, and to adjust image size whlie adding image as watermark.
How to convert 2D videos into 3D movies
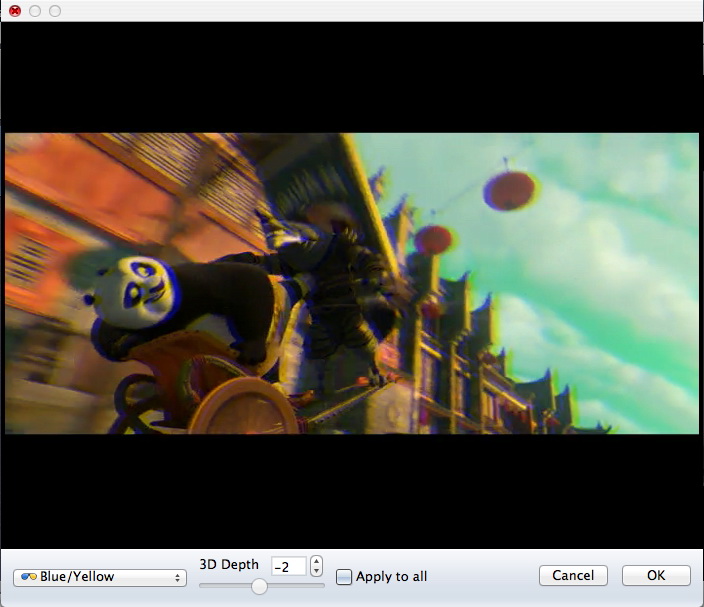
Leawo Video Converter for Mac still includes an internal 3D movie creator that could let you creat 3D video from 2D video by setting 3D depth and selecting one effect from those 6 different 3D effects: Red/Cyan, Red/Green, Red/Blue, Blue/Yellow, Interleaved and Side by Side. Firstly select a video and then click 3D button to enter the 3D settings panel, where you can select 3D effects, set 3D depth ranging from minus 50 to plus 50, and preview 3D movies.
![]()
Users Say
As consumers, I love companies offering solid product guarantees. It proves the company has faith in its product, and is making a solid effort to gain your trust.
-From Donald through our support center
Social Network
Join Our Newsletter: