Leawo iOS Data Recovery User Guide
Leawo iOS Data Recovery is a comprehensive iPhone, iPad and iPod Touch data recovery tool. It helps users to retrieve 7 kinds of deleted files directly from your iOS device, including contacts, messages (MMS, SMS, iMessages), call history, calendar, notes, reminders and Safari bookmarks. Also it can support to easily recover 12 types of lost data from iTunes and iCloud backup, like photos, videos, contacts, messages, voice memos, notes, etc.
Try the magic iPod/iPad/iPhone data recovery software by following the user guide right now:
Firstly, connect your iOS device to the computer and then launch Leawo iOS Data Recovery. When your device is detected by the program, a start interface is as below.
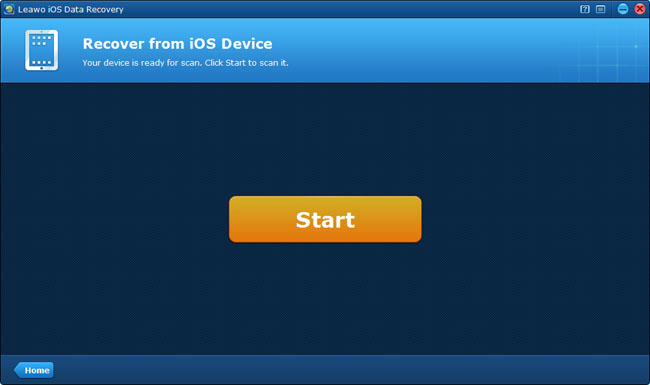
Click "Start" button, the program will automatically enter the Recover from iOS device mode.
Recovery Mode 1: Recover from iPhone, iPad & iPod touch directly
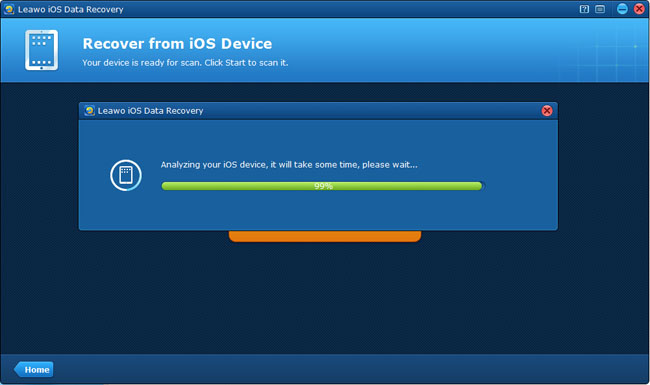
Step 1Scan your device
The default recovery mode of Leawo iOS Data Recovery is recovery from iOS device, click "Start" button, the program will start to analyze and scan your device automatically. It will take few minutes, please wait patiently.
Step 2Preview found data and select files to recover
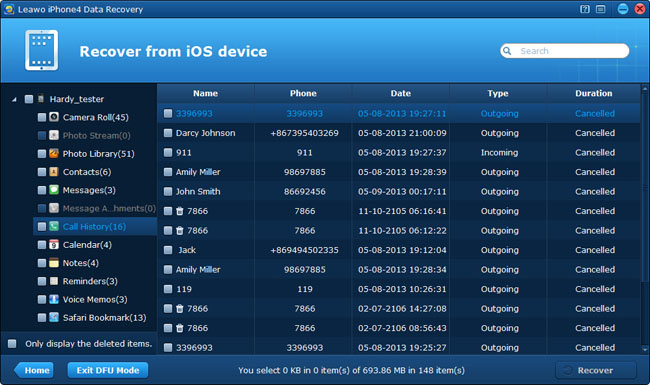
After scanning, all the data in your device (including the deleted data) will be listed on the left sidebar categorized by 12 file types: Camera Roll (photos & videos), Photo Stream, Photo Library, Contacts, Messages, Message Attachments (photos, videos, voice memos, contacts), Call History, Calendar, Notes, Reminders, Voice Memos, Safari Bookmarks.
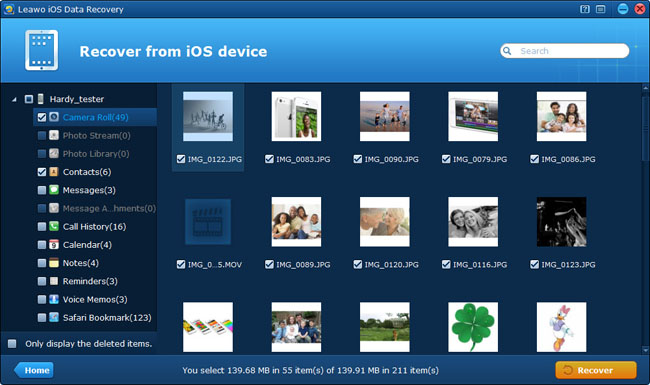
Preview the data one by one and check the items you want to recover, or tick the bottom-left corner checkbox "Only display the deleted items" to only recover the deleted data from iOS devices.
Step 3 Choose storage location
After selecting files, click "Recover" button on the bottom-right corner of the interface to start data recovery from iPhone, iPad or iPod Touch. You can tick the checkbox to "Automatically open the output folder after finishing recovery".

Recovery mode 2: Recover from iTunes Backup Files
If you have lost or broken your device or merely want to recover iTunes backup data, then you can choose the second recovery mode: Recover from iTunes Backup.
Step 1Enter "Recover from iTunes Backup"
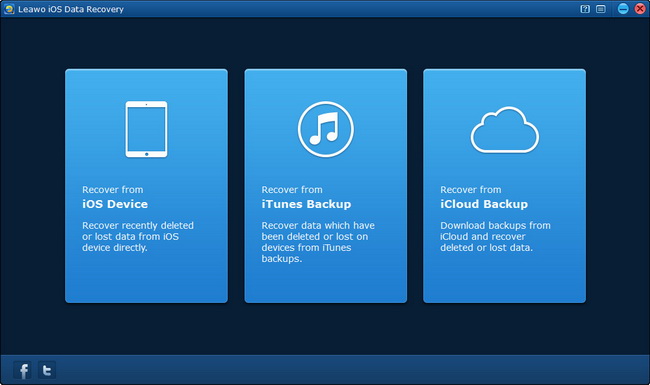
If your device has not been connected, you'll lead to the following interface after launching the software. Simply choose the "Recover from iTunes Backup" option to enter the mode.
If your device is being connected, you can directly click the "Home" button on the bottom-left corner on any interface to return to the home interface and then choose "Recover from iTunes Backup".

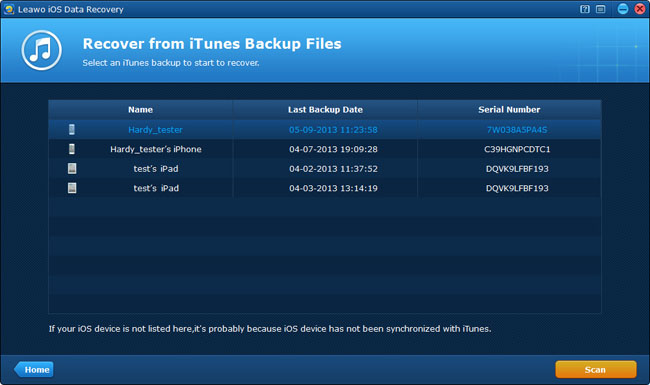
Step 2Select an iTunes backup to scan
After quick scanning, all the iTunes backup files of your iPhone, iPod and iPad on the computer will be shown. Select one iTunes backup to retrieve data files from iPhone, iPad or iPod Touch.
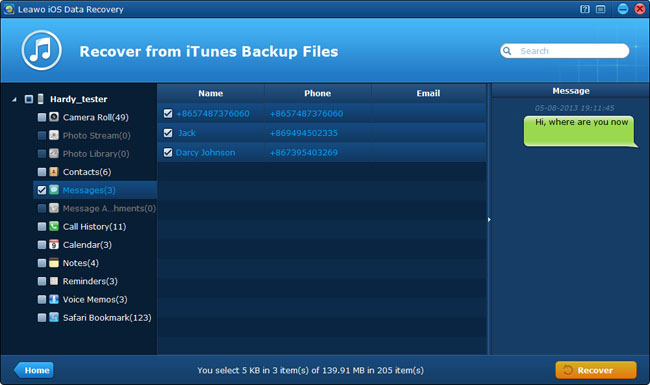
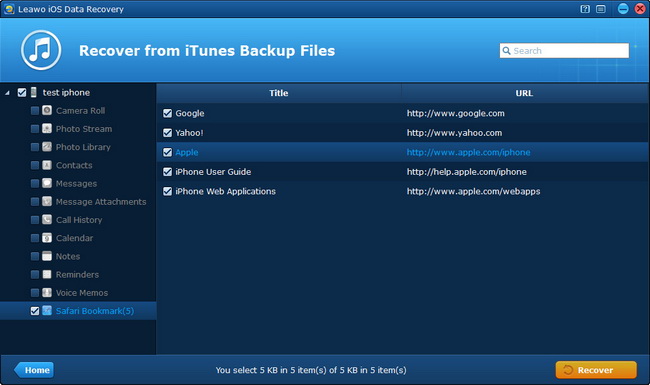
Step 3Choose previous files to preview and recover
After choosing an iTunes backup, the software will start to scan the files in the backup. When the scan finishes, you can preview all the items listed on the left sidebar and then click "Recover" to achieve iOS data recovery from iTunes backup.
Note: If you want to recover them by this recovery mode, remember not to sync your device with iTunes once the data on your computer have been lost, or the new iTunes backup may cover the previous iTunes backup after the sync, and you may not find back the previous data.
Recovery mode 3: Recover from iPhone 4 and iPod touch 4 under DFU mode
DFU mode is respectively designed for the specific iPhone 4 and iPod touch 4 devices. With them, you can restore deleted iPhone 4/iPod touch 4 data directly from the devices or find back the lost data files by extracting previous iTunes backups that you have made.
When connecting your device with the computer, the program will automatically examine your device and select "Recover from iOS device" mode in the first place.
Note: To let the program recognize your iOS device, you should keep your device on.
Step 1 Activate DFU mode
In this data recovery mode, the program will ask you to do as the three steps below in limited time to activate the DFU mode of iOS device:
1. Hold your device and click "Start" button in the data recovery program.
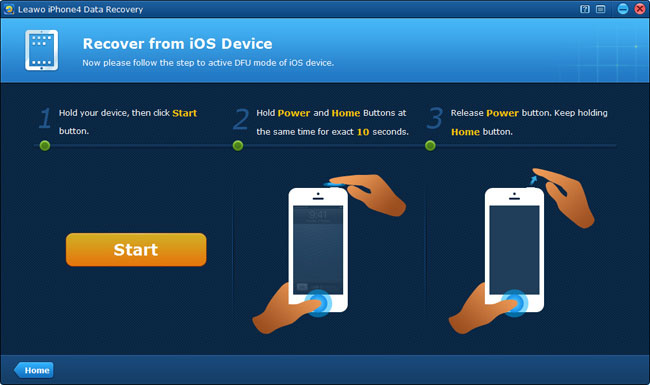
2. Hold "Power" and "Home" buttons of your device at the same time for exact 10 seconds. You'd better watch the countdown seconds on the software interface while operating the steps.
3. When the 10 seconds passed, release the "Power" button at once, but keep holding the "Home" button for another 10 seconds until you see the tip that you've successfully entered the DFU mode, and then you can release the "Home" button now.

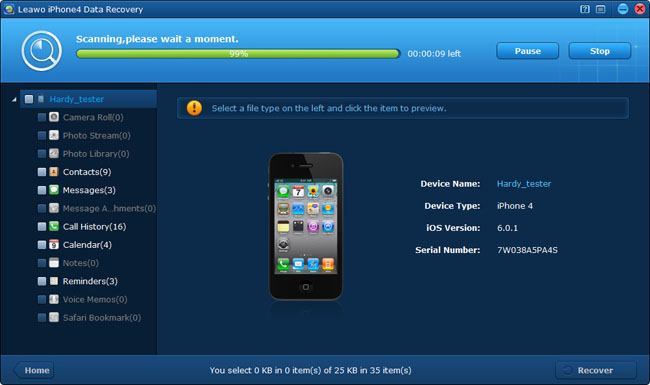
Step 2 Scan your device
When you have successfully entered the DFU mode, the program will automatically communicate with your device and then scan the device for all the lost data. The scanning duration depends on the quantities of files in your device.
Step 3 Preview found data and choose for recovery
After the scan finishes, you'll see all the found data files in the left sidebar including some of the files that have been deleted by you and some files you won't see directly in your device. Choose one or several categories to preview and then tick the files that you want to recover from your device.
Step 4 Select storage location and recover
After choosing the files you want to retrieve from the device, click "Recover" button, then you will see a pop-up window to choose a saving place for the output files, and tick the option "Automatically open the folder after finishing recovery" and then you'll soon get the data on the computer.

Recovery Mode 4: Recover from iCloud Backup
If you have some backups in your iCloud, you can give this recovery mode a try. The following guidance will show you how to extract files from iCloud backup.
Step 1Choose "Recover from iCloud Backup"
Run Leawo iOS Data Recovery and choose “Recover from iCloud Backup” in the window. If your iOS device is connected to computer with USB cable, you can click “Home” button at the left bottom to return to the main interface of Leawo iOS Data Recovery.
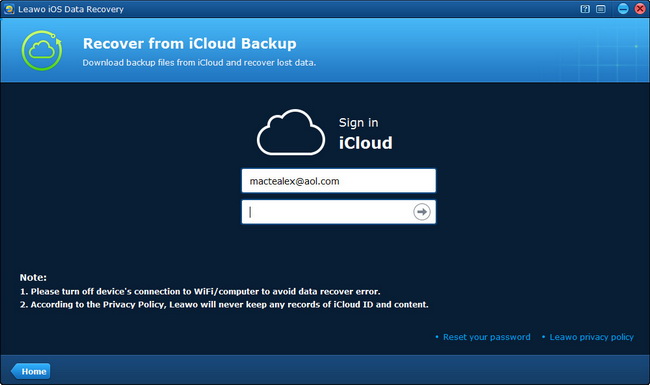
Step 2Log in With Apple ID
Log in the Apple ID that your iPhone upload data with. After entering the Apple ID, you can click the Enter button (Right Arrow with Circle) or hit Enter on your keyboard to move to next step.
Step 3 Select iCloud Backup
After entering the Apple ID, this iPhone data recovery software will scan the backups in your iCloud, and then display one iCloud backup in the main interface. If you are the first time using this software, you need to click “Download” at the right bottom to download the iCloud backup. If you have logged in the wrong backup, you can click “Log Out” at the left bottom to return to previous step.
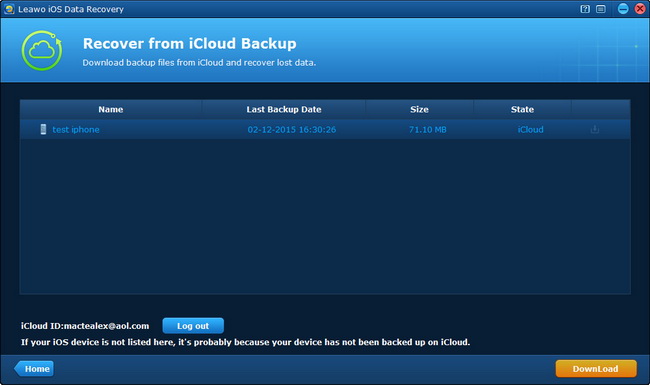
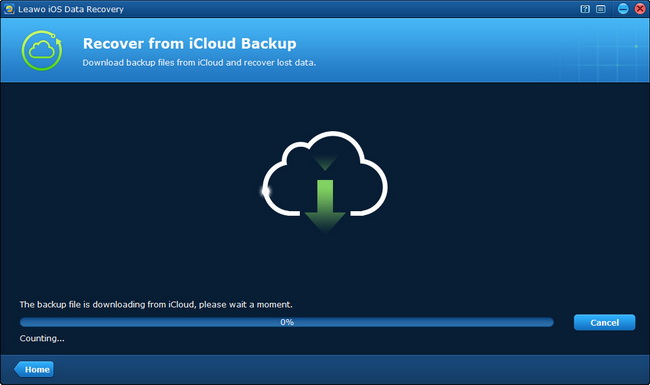
Step 4 Download iCloud Backup
This iPhone data recovery software will download the iCloud backup at first. The time of the download depends on the size of your iCloud backup. You can cancel the download by clicking "Cancel" at the right bottom.
Step 5 Select Files to Recover
When the download of the iCloud backup is finished, Leawo iOS Data Recovery will start scanning the contents in the iCloud backup. When the scan is done, you can choose the category in the left sidebar, and check the contents in the right part to recover. Then click “Recover” at the right bottom.
Step 6 Choose Target Folder
After clicking the "Recover" button, you will see a pop-up dialog. Click “Open” to choose a folder on your computer to save the exported files. Then click “Go” to start extracting files from iCloud backup.